Saturday, September 13, 2014

Finishing Necks - a New Approach

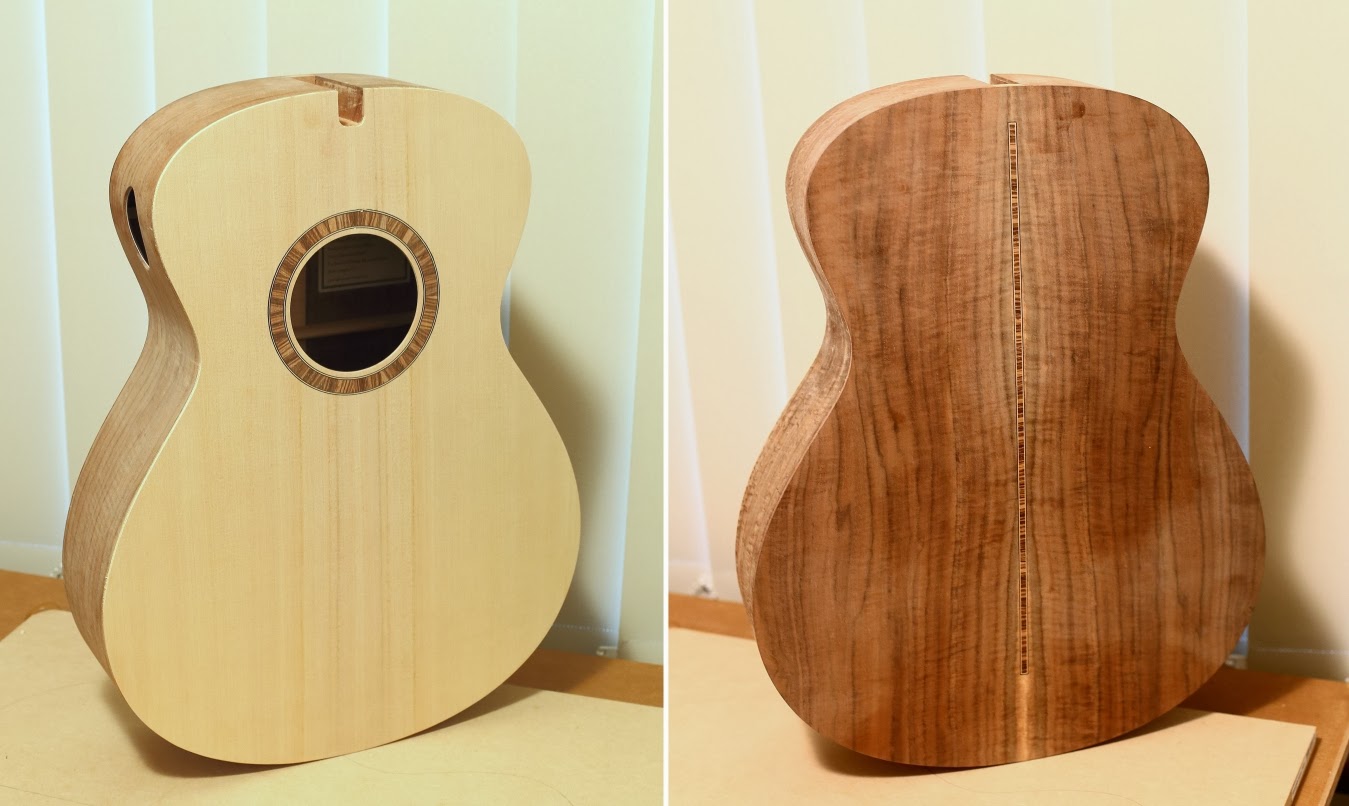
I've been keen to try a new approach where finishing necks is concerned, and have opted to experiment with some oil finish products on a couple of the necks I'm currently constructing. Gloss finishes certainly look classy, but many players express a preference for a matte or satin neck finish that doesn't "grab", as some gloss finishes are prone to do.

Like many other aspiring builders, I finished my first couple of guitars with Birchwood Casey's Tru-Oil. It's easy to apply, relatively benign, and seems impervious to moisture once cured. What's more, it's readily available locally - always a plus for someone like me, living in far-away Australia. I recall reading of tests that showed it doesn't penetrate the wood surface deeply, which adds to its appeal for those builders unwilling to make the leap into sprayed or french polished finishes.


Despite Tru-Oil's attractions, I've recently investigated some alternatives and purchased small quantities of the products pictured above. A local gunsmith told me preferred the Livos product rather than Tru-Oil, and I've read reports by builders in the solid-body electric world who have used the Osmo product with great success. I guess it's best that I find out for myself!

The manufacturers' web sites describe how each of these products penetrate the wood and dry within it, rather than on top of it as Tru-Oil does. If I was finishing the body of an instrument, this would ring alarm bells - particularly where the soundboard is involved - but where necks are concerned, I'm not at all worried about the oil penetrating the wood surface; in fact, to my mind, this characteristic could offer advantages. Although I'm not expecting significantly different outcomes, I plan on trialing each of the two finishes to satisfy my curiosity once and for all.

As a nod to convention, I'll spray a gloss finish on the headstock face and the heel cap before I fine-sand, then oil, the remainder of the neck.

Product links:
Birchwood Casey Tru-Oil

Sunday, July 27, 2014

The World's Longest Apprenticeship

As I look forward to resuming work on the three guitars I'm currently constructing, it's sobering to reflect on my guitar building progress so far, and just how long it's taken me to get where I am. It's timely to do so given that I've at last attained a level of confidence that will allow me to offer my instruments for sale. I sold a few of my early efforts many years ago, but like so many beginning builders, I was probably too eager to do so, not quite comprehending the risks involved and the potential for conflict with disgruntled customers. Fortunately, those guitars haven't returned to haunt me; in fact, one of those old customers contacted me not so long ago to tell me he how much he still loves the guitar I built him. What a pleasant surprise! 

"I can see the progress you have made in the time elapsed since creating my guitar but there's still no denying what a great little instrument my guitar is - I am still trying to do it justice with my playing - which has not progressed on parallel terms with your luthier skills. I would not hesitate to recommend any player interested in a custom guitar to you and if I thought you were willing to take orders for sales I would be very happy to be more proactive in that regard."

Finding a finish material I could apply safely and to a satisfactory standard has been a hurdle I feel I've at last negotiated, and as I look ahead with visions of reducing the hours I spend in a "normal" job, I have high hopes that the sale of my guitars can at least supplement my income and give me a creative outlet.

I first became interested in guitar building in the mid 1980s, but in those pre-internet days here in Australia I found it almost impossible to accumulate the knowledge I craved, let alone locate anyone who could pass on their skills in person. I can't remember how, but at some point I managed to find a copy of Irving Sloane's book "Classical Guitar Construction" which I read and re-read many times over. Shortly thereafter, while backpacking through Canada, I was excited to spy Tom and Mary Evans book, "Guitars: From the Renaissance to Rock" which, although short on information relating specifically to guitar construction techniques, was a worthy addition to my sparse reference library.

Quite by accident, as I explored Vancouver I came across Richard's Rare Guitars, where a staff member was kind enough to phone Jean Larivee and seek permission for me to visit his North Vancouver workshop which was within easy walking distance. I found Jean very welcoming, and he was good enough to allow me to sort through an enormous pile of Sitka spruce soundboards at the front of his shop. My backpacker's budget was pretty tight, but I selected five tops (at $25 each from memory!), not really knowing what features I should be looking for, but feeling incredibly excited to have at last found the materials that would help me get started on what has turned out to be a protracted self-imposed apprenticeship. Between the spruce tops and the books I bought in Canada, I was quite heavily laden for the remainder of my overseas trip!

Fast forward to today, and the wealth of books, online resources and lutherie schools is overwhelming - I guess I was born too early. I feel incredibly lucky to have an interest in common with so many other individuals who so generously share their skills, knowledge and techniques. The online community, including the various guitar forums, is a fantastic resource both as an opportunity to learn from others, and as a means of sharing our creations.

Hopefully, I'll have something other than idle thoughts to share with you soon!

Cheers
Pete

Thursday, May 15, 2014

Rosewood/European Spruce Mod OM Progress

I was building up some momentum with my guitar-building adventures until recently, but a short overseas holiday and an impending interstate trip are temporarily slowing progress. Nevertheless, I have at least managed to attach the top on my East Indian Rosewood/European Spruce guitar, and have make good progress with the neck.


More soon!

Cheers
Pete

Friday, April 4, 2014

A Workshop Update

With IT work in short supply, I've been "forced" to dedicate much more time to guitar building over the past couple of months. Well, I'm not really complaining!

It stands to reason, of course, that spending more time in the workshop will increase my output. Nevertheless, I've been pleasantly surprised by my rate of progress as my current guitar projects take shape. With the luxury of two days a week dedicated to building - and thinking about building - I've been able to make significant inroads into these three guitars, as well as identify a couple of steps in the build process that I feel could benefit from further thought and refinement. As usual, the next guitar will be better!

European Spruce/East Indian Rosewood
The guitar pictured above features a European Spruce soundboard, and a very attractive set of East Indian Rosewood back and sides. The florentine cutaway is only the second one I've attempted, and although it represents more work and an increased degree of difficulty, I'm satisfied with the way it's turning out.

Port Orford Cedar/Claro Walnut
The Port Orford Cedar/Claro Walnut guitar featured in recent posts is waiting in the queue, with the body ready for binding and work on the neck largely complete. I'm quite pleased with a new design flourish I've implemented on the heel cap. The "scoop" evident on the heel itself is another new development; the goal being to echo the aesthetics of the headstock and fretboard end in an attempt to tie these elements together from a design perspective. The photographs show these details, with final shaping and sanding yet to be completed, and with the heel cap unattached.

Redwood/Claro Walnut OM
This Redwood/Claro Walnut OM has been languishing in the cupboard for several months while I wait for the motivation necessary to apply the sprayed finish coats. As the other two guitars rapidly approach a similar state of completion, it's unavoidable that finishing, sanding and buffing will occupy the bulk of my time very soon. Having said that, I plan on applying an oil finish to at least one of these necks, a side-effect of which will be that the finishing process will be slightly less time-consuming than it would be otherwise. 

With storage space at a premium, I'll be strongly resisting the urge to begin another guitar until this batch is complete and - hopefully - distributed to new owners!


Cheers
Pete

Tuesday, February 18, 2014

Fretboard Binding

Gluing the purfling to the binding before it's attached to the fretboard edge seemed to be the most logical approach when I began binding my fretboards, but I found it a challenge to accurately align the lower edge of the purfling with the underside of the board, no matter how careful I was when gluing and clamping it in place.

I managed to achieve acceptable results on the first couple of bound fretboards, but was uncomfortable with the process and felt there must be a better way. After dwelling on the problem off and on for a while, it occurred to me that I could just glue the binding on first - sans purfling - without fussing too much about aligning its lower edge exactly.

To solve the problem, I've knocked together what could best be described as a mini router table. With my laminate trimmer clamped in position from below, and a makeshift fence in place, I make some test cuts on scrap, adjusting the trimmer so that the rebate cut by the router bit will be the exact depth of the purfling strip. The width of the rebate isn't quite as critical, as long as it's less than or equal to the width of the purfling - any overhang can be trimmed off later.


Having set up the trimmer and fence, it's a simple matter of running the bound fretboard along the fence to accurately form the rebate for the purfling. The curved sections at the soundhole end of the board deserve some special treatment, but they're easily addressed using a similar approach.


All that remains is to glue the purfling strips into the rebate, with help from the same clamps used to glue kerfed linings strips in place. The purfling at the soundhole end of the fretboard is mitred to achieve a neat look.


I'm sure there are other equally effective methods, but this one works for me!

Cheers
Pete

Fingerboard Inlay

I think it's a commonly held view that for the majority of players, traditional fretboard markers provide little practical benefit (the markers on the fretboard edge are a different story), but I can't quite bring myself to leave the fingerboard totally devoid of decoration. Having said that, my ambitions where inlays are concerned are modest indeed, and while there's no denying the skill and sheer artistry displayed by the likes of Larry RobinsonGrit Laskin and Jimmi Wingert, I have no desire to emulate them - even if I thought I had the ability and temperament to do so.

The abalone and pearl inlay I've come to regard as my own was originally inspired by the decorative elements found on Bob Benedetto's arch-top guitars, but has evolved over time to the extent that my conscience is now clear - I no longer view it as imitation. I'm not adept at distilling design ideas down to abstract representations - I'd fail miserably at logo design, for instance - so whatever I dream up tends to be fairly representational. Where my fretboard inlay is concerned, I've stretched those personal limitations ever so slightly, but it's still blindingly obvious that the inlay represents a single flower flanked by two leaves.

I draw the shapes freehand, directly onto the pearl and abalone blanks, then cut the pieces out with a jeweler's saw. I don't feel the need to be terribly careful as I cut, knowing that the shapes of the individual pieces lend themselves to clean-up and refinement on my spindle sander. I'm quite happy for the exact shape to vary from guitar to guitar; given that I strive for accuracy and consistency where every other aspect of the guitar is concerned, it's nice to introduce some elements that have come into being by a more organic process.


My Dremel has its shortcomings and limitations, but it's an appropriate tool with which to route the inlay cavities. I need to keep the cavities free of wood dust as I proceed, and the solution is provided by an aquarium pump running alongside me on the bench. The outlet hoses from the pump are taped to one of the pillars on the Dremel base, and direct a constant stream of air onto the work. They disperse the ebony dust as soon as it's produced, which helps maintain a clear view of the lines I've previously scribed around the individual inlay pieces.


Using tiny spiral downcut router bits, I can cut accurately up to the lines, with a scalpel blade and my smallest chisel tidying up the corners that were too tight for the router bit to deal with. The inlay experts would have me believe that it's prudent to undercut the edges of the inlay cavities with a ball-end bit, but my inlay is so simple, and my results to date of a decent enough standard, that I haven't found it necessary to explore that option. If I've been careful enough, any gaps between the inlay and the walls of the routed cavity are insignificant. Those that are evident are easily hidden with matching wood dust and a drop or two of thin cyanoacrylate (CA) glue applied after the shell pieces have been glued in place. Of course, it helps that ebony is very forgiving in this regard!


Cheers
Pete

Saturday, February 1, 2014

Fitting the Back

Perhaps there's some aspect of successfully fitting the back that represents a significant milestone along the way to completing a guitar, or maybe it's just that I've repeated this part of the process enough times that I feel confident in the outcome and have come to enjoy the sensation and sound of the back braces clicking neatly into their pockets. Whatever the reason, it's a part of the build process I look forward to and derive great satisfaction from.

To reach this milestone - assuming that the dome of the back has already been sanded into the rims - I carefully align the back with the centres of the head and tail blocks, then mark the sides where the brace closest the the tail block will intersect them. I lay a steel rule across the guitar to join the corresponding marks, and pencil the line of the braces onto the top surface of the linings. 

As a precaution against chipping, I make a saw cut equal in depth to that of the brace end on the side of the pocket likely to be chipped by the clockwise rotation of the bit. I hope the right-hand photograph below shows this clearly.


With a spiral downcut bit mounted in the Dremel and carefully adjusted for depth, I rout the first pair of brace pockets, using the pencil lines as a guide. If the marks were placed accurately, the braces slip into place with just a hint of resistance. I check the fit of the back and widen the appropriate brace pocket to compensate for any misalignment. Once I'm happy with the fit and alignment, I can mark the next pair of brace pockets, confident that the alignment of the back will be more securely and accurately established as I proceed. When the four pairs of brace pockets have been prepared and the back fits perfectly, I can allow myself a moment of self-congratulation - before I remind myself that it's really only a minor triumph and that there's plenty of work ahead of me!


Cheers
Pete

Wednesday, January 29, 2014

The Modified OM

With the messy job of constructing a new bending form and outside mold finally out of the way, I've been able to make some progress on this guitar over the past week.

The walnut sides bent willingly, as they always do, and I was pleased to see that they conformed closely to the new mold, with the exception of some minor spring-back on one of the lower bouts. The spring-back was a useful reminder that it's advisable to subject the sides of any wood species to a couple of heating and cooling cycles before removing them from the bending form. I have to try hard to resist my innate impatience, and on this occasion I was a little premature in taking the second side out of the side bender, hopeful that such a compliant wood wouldn't require a second cycle. A quick touch-up on the electric bending iron soon had the side sitting obediently in the mold.


With the head block, tail block and kerfed linings glued to the sides, I'm better able to assess the new body shape. Needless to say, I'm greatly relieved that it matches my expectations, and that the time-consuming and incredibly dusty task of making yet another bending form and outside mold has been averted.


Noting the recent emergence of guitars referred to as "modified dreadnoughts", and lacking a more imaginative idea, it seems reasonable to dub my new guitar model the "modified OM"! 

Cheers
Pete

Tuesday, January 28, 2014

Kerfed Linings

I've fabricated kerfed lining strips from mahogany in the past, and while that's a popular and appropriate choice, on this guitar I was in the mood to use linings that closely match the colour of the spruce back braces. Spruce doesn't exactly grow on trees in my neck of the woods (puns intended), so I substituted Jelutong - a lightweight, light-coloured South East Asian hardwood species that serves this purpose well.


After bandsawing and thickness-sanding the strips, I set up a crude but effective jig on the bandsaw that helps me cut kerfs of a consistent spacing and depth. I leave a little more wood between the extremity of the cut and the opposite face of the lining than it seems is common with the off-the-shelf product, and the strips I prepare are a little more robust as a result. If there's any trade-off, it's that I feel the need to pre-bend the waist and upper bout portion of the linings on my bending iron prior to gluing them in place, more as an added precaution against breakage than out of any real necessity. 


A pet peeve, and the motivation for devoting a little time to preparing my own snap-resistant kerfed linings, is seeing an otherwise carefully crafted instrument whose linings are joined at some point, particularly when such joins are in plain view through the soundhole. Sacrilege!


Cheers
Pete

Thursday, January 9, 2014

Headstock Binding Completed

Given the effort involved in binding a guitar headstock, I'm curious as to the upcharge a professional builder might reasonably apply, and whether a fee acceptable to the buyer could adequately compensate the builder!

Not only does my chosen headstock shape dictate that one of the sections of binding must conform to the tight curve at the extremity of the headstock, but mitering the individual binding pieces prior to gluing requires painstaking attention to detail. I know many builders cut these miters in-situ with a sharp chisel, but for better or worse, I choose to use my disc sander to do so prior to gluing them in place. As they're fitted dry in the first instance, I have the luxury of being able to discard any pieces whose miters don't meet my standards, with the need to start all over again acting as a strong incentive to get them right on the first attempt! With a light touch, and a patient approach that involves constantly checking for an exact fit, I'm able to produce tight fitting miters using this method.

Before I can think about mitres, however, I need to prepare the sections of ebony strip. The first step is to glue a black/natural purfling to one edge of the binding. I do so with the help of the clamps normally reserved for gluing kerfed linings, as the photo below shows. For the straight sections of binding, regular Titebond is adequate, but for those sections that will be bent into a curve - excluding the piece that fits the tightest curve and is treated differently - I like to use Titebond III, which is better able to withstand the heat involved in shaping the strips on my bending iron. Unless a piece of ebony is particularly reluctant to bend, I find they can usually be coaxed into shape without the use of water.

Gluing the black dyed and natural maple(?) purfling to the binding edge.

Maple veneer glued to what will become the inner face of the bindings.

Test fitting the first of the mitred corners, minus glue.

It goes without saying that accurately positioning the binding pieces as they're glued and taped into position, then tightly butting up the adjoining piece as it in turn is glued, contributes to an acceptable outcome. Call me strange, but when carrying out tasks like this that demand my close attention, I find that tidying up my work space before I begin unclutters my mind as well as my workbench - the Zen of guitar building in action perhaps!

One concession I make these days is to acknowledge that the tightly curved section can more easily be fabricated from two thin pieces of ebony rather than a single full width piece. As anyone who has attempted to bend ebony into a tight curve on a bending iron can attest, this makes life a lot easier. Once glued, scraped and sanded, it's almost impossible to detect that this section of binding has been laminated. To begin with, I run two pieces of ebony binding through the drum sander until they're half the desired binding width. The pieces can then be bent on the bending iron until they conform to the curve without the need to be forced into position. Once I'm happy with the fit, I laminate the two pieces of ebony, adding a layer of maple veneer to what will be the inner face as I do so.

Because this section of binding is fabricated from two layers of ebony, it's not possible to edge the piece with a strip of black and white purfling prior to bending as I did for the other pieces. Instead, I wait for the glue to dry, then clean up and glue one of the edges to a piece of black and white veneer sheet that has been prepared earlier. Once the glue has dried, the surplus veneer is trimmed from the inner and outer faces of the ebony strip, duplicating the look of the other binding pieces.

Completed headstock

Cheers
Pete 

Sunday, December 29, 2013

Preparing the Headstock for Binding

I tell myself with each guitar I make that I'd save myself a lot of trouble if I left my headstocks unbound. Nevertheless, despite the fact that many of the top makers choose to omit this feature, and still manage to produce the kind of elegant, beautifully appointed instruments I aspire to build, the Macassar Ebony headstock overlay on my latest guitar was always destined to be bound in ebony, with a thin maple line inboard of the binding for the sake of contrast. Were I building guitars commercially, there would surely be an added incentive to leave the edge of the headstock overlay unadorned, perhaps offering the bound look only as an option - for an appropriate upcharge of course!

An earlier guitar featuring a bound headstock 
I use a laminate trimmer to cut the ledge for the binding. I select the appropriate bearing and make a test cut on a piece of scrap to confirm that the resulting rebate will match the width of my ebony bindings, with additional allowance for the maple veneer. Having done so, I adjust the depth of cut so that my first circuit of the headstock will cut the ledge just shy of the full depth required. My ancient Hitachi laminate trimmer isn't renowned for ease of vertical adjustment, so I repeat the process, increasing the depth of cut in tiny increments until the bit barely removes the last of the headstock material on the bottom of the ledge.

Routing the binding rebate
It's imperative when routing the ledge that I think carefully about the grain direction of the headstock overlay and the router bit's direction of rotation, with the potential for chipping and tearout always in mind. Proceeding carefully, I can climb-cut the most susceptible areas and end up with a clean, chip-free binding ledge.

The completed binding rebate.
I'll describe the fiddly process of preparing the individual binding pieces in my next post.

Cheers
Pete

Saturday, December 14, 2013

Soundboard Braces

The soundboard braces have been shaped to a 25 foot radius and attached to the top, again using hot hide glue. I look forward now to profiling and carving them to their final dimensions, my goal being a light and lively soundboard. This is surely the most tactile and intuitive stage of the entire building process, when machinery and power tools lay temporarily silent, and finger planes, chisels and sandpaper take over.


A useful pointer to where I'm at on my quest to build a high quality instrument is that the soundboard bracing on each new guitar still seems to be lighter than that of the last. In many respects, I'm sure it's a good thing that my evolution as a guitar builder has been such a gradual process, with small incremental improvements marking what has been a long journey. Where soundboard bracing is concerned, I acknowledge that a bolder individual willing to take risks would equal my progress after far fewer guitars, but I'm happy nevertheless to plod along at my own cautious pace, learning as I go, improving my skills and gaining satisfaction from the improvements I see and hear after each guitar is completed.

With my weekends still dominated by household chores, my resolve to chip away at this guitar in spare moments through the week is certainly yielding results, as evidenced by my latest posts. Lurking in the background, however, is the need to construct bending forms and an outside mold to accommodate the modified body shape I've recently devised. Unfortunately, at some point soon, this necessity will act as a barrier to further progress and I'll be unable to avoid the task any longer! 

Cheers
Pete

Monday, December 9, 2013

A Guitar Back is Born.

A half hour here, an hour there, and before you know it, a guitar back has materialised. I've been making a concerted effort to make progress on this guitar after work throughout the week, when I would typically be less than productive where guitar building is concerned.


The back halves were joined with Titebond as usual, but I thought I'd attempt to use hot hide glue wherever else I can on this instrument. Apart from its great strength and resistance to creep, I enjoy the fact that it's so easy to clean up once the parts are joined and clamped. After allowing a short time for the squeeze-out to gel, most of it can be easily removed with a chisel-shaped scrap of spruce. A sponge dipped in the hot water from my glue pot, wrung almost dry, removes the remainder of the glue pretty effectively.

Attaching braces to the soundboard would seem to be a realistic goal for the week ahead. We'll see whether Murphy's Law allows me to achieve it!

Cheers
Pete

Tuesday, December 3, 2013

New Design, New Guitar

While the task of spraying my Walnut/Redwood OM remains on the "to do" list, I've managed to sneak in a little progress on a new guitar, this time combining a Port Orford Cedar soundboard with the sister set of Claro Walnut back and sides.


I fell in love with the venerable Martin OM when I first saw one many years ago, and as much as I still admire its timeless design and elegant curves, I feel ready to leave it behind me and develop a more contemporary body profile I can call my own.

I build guitars with the fingerstyle guitarist in mind and, taking note of player preferences commonly espoused by players in that style, I've nipped in the waist slightly, reduced the width of the upper bout and rounded the shoulders, the end result of which - I hope - is a comfortable and aesthetically pleasing body shape. The price I pay is the additional work involved in constructing molds and bending forms to accommodate this new design, so it's sobering to reflect on the fact that until the first body is assembled, I won't know for sure that the dimensions will appear balanced and attractive. Building molds isn't exactly my idea of fun, so I certainly hope I don't have to repeat the exercise! 

Cheers
Pete

Wednesday, October 9, 2013

Back From Africa

After a memorable trip to Botswana in Africa, I'm gradually getting back into something resembling a routine. With the trip behind me, I'm keener than ever to catch up on my hobbies, including not only the guitars I have ready to spray, but also a new guitar featuring a modified body shape and some fresh ideas where the more decorative elements are concerned.


I'll have more updates soon.

Cheers
Pete

Sunday, August 25, 2013

A Broken Promise, and Some New Rosettes

After promising myself I wouldn't begin my next guitar until the two I'm currently waiting to spray were complete, I've relented a little and have spent some time fabricating and inlaying some new rosettes over the past week. With wet weather still the norm, and a trip to Africa looming large, it was becoming increasingly unlikely that I'd get to apply finish to those guitars any time soon, hence the broken promise - an opportunity to spend time in the workshop!

European Spruce, with Zebrano, Ebony and coloured veneer rosette
Port Orford Cedar, with Zebrano rostete
Sitka Spruce, with Zebrano and Ebony rosette
Engelmann Spruce, with East Indian Rosewood rosette

I wouldn't tempt fate by proclaiming that I've in any way mastered this aspect of guitar construction, but I'm pleased to be able to produce rosettes like these to an acceptable standard fairly consistently these days.

Cheers
Pete

Wednesday, May 22, 2013

From Ugly Duckling to Beautiful Swan

There's still a long way to go with this guitar, but the full effect of the black and red theme is beginning to emerge now that the top bindings are in place. As gradual as the process is, I'm pleased to be leaving the "ugly duckling" stage behind at last.


More soon!

Cheers
Pete

Saturday, May 18, 2013

The Black and Red Guitar

I've been working on this East Indian Rosewood/Sitka Spruce OM at more or less the same pace as I have the Claro Walnut/Redwood guitar featured in recent posts, but progress has fallen behind a little in recent weeks as I've focussed my attention on preparing the Walnut/Redwood guitar for finishing.

While I wait patiently for a trio of fine days suitable for spraying, it's a good opportunity to catch up a little where this black and red OM is concerned. The purfling has been in place for a week or two, and with the end wedge now installed, I've begun the process of gluing the ebony bindings in place. It's not a task I particularly look forward to, which hints at the fact that I'm yet to feel I've attained any level of mastery over this particular aspect of guitar construction.


It will certainly be intriguing to assess the two guitars' responsiveness and tonal characteristics individually, but I'll be especially interested to make comparisons between them. Shaping of the soundboard braces on both guitars was completed at around the same time, the end result being what I perceived to be similarly responsive tops once I'd concluded the cycle of brace shaving, tapping and flexing. If popular wisdom proves to be well founded, the wood species used in these guitars will have a significant influence on the sound I'm ultimately able to coax out of them, and they'll show themselves to be very different from one another, tonally speaking. On the other hand, my assessment could lend weight to the theory that the sound of an instrument reflects the builder's individual style and methods as much as it does the materials used in its construction, in which case their tonal differences might be more difficult to detect. Whatever the result, and for the first time ever, I can confidently predict that I'll be able to share sound files and/or videos with you here on this blog. Eventually, that is!


Cheers
Pete

Friday, May 10, 2013

Spray Day Delay

With epoxy pore filling of the back, sides, neck and rosette of this guitar completed, it’s a case now of waiting for a string of fine days and a concurrent break in my regular daily work commitments. Without an enclosed spray booth, I need three consecutive days of good weather to complete my spraying schedule, with a day off work an unfortunate additional requirement.


In readiness for spraying, I've calculated the bridge position and masked the top in the area of the bridge and fretboard extension with a thin, low-tack adhesive film known as frisket film. The edges of the frisket film in the area of the bridge are around 3/16" inside the bridge outline. I've found that by leaving such a margin, it's much easier to level sand and buff the finish in the vicinity of the bridge perimeter. The frisket film is removed only after the body is buffed and I'm preparing to glue the bridge.

After two brushed coats of Ilva TF23 sealer, I'll spray a maximum of five coats of Grafted Coatings’ KTM-SV per day, for a final result of 15 coats of KTM-SV on back, sides and neck, with 10 coats on the soundboard. After level sanding and buffing, I’ll end up with a thin, flexible finish that has minimal impact on the responsiveness of the soundboard while still providing an adequate level of protection.

More soon - good weather permitting!

Cheers
Pete

For Sale: Claro Walnut/Redwood OM

It's taken such a long time to complete this guitar that it features a body shape I've long since modified. The shape of the heel is...