Thursday, April 10, 2025

For Sale: Manchinga/Engelmann Spruce OM

With this - the first of a batch of five guitars - now strung up, I can begin to relax a little and allow myself a moment to enjoy the sense of achievement at having completed an instrument; for various reasons, it's been a while!

There's always a sense of nervous anticipation when I first install strings on a new guitar, but even after hearing the first notes ring out I know better than to pass judgement immediately; it would seem too much like anticipating a toddler's potential as an Olympic sprinter after witnessing their first steps! Instead, I let it sit undisturbed for a week tuned to concert pitch, knowing even then that only the passage of time will reveal its true character. After this initial settling in period, I fine-tune the action, saddle height and intonation - it's only then that I can derive some sense of its sonic potential. I certainly have expectations where tone is concerned, but they're somewhat nebulous and hard to describe. In terms of aesthetics, I'm very pleased with this instrument, but I'm anything but an accomplished player, so I look forward to receiving feedback from someone more proficient than I am where ergonomics and tone are concerned.


While the woodworking and finishing aspects of my guitars seem to improve incrementally with each instrument, and are relatively easy to assess, the complex and all-important tonal characteristics are more difficult to evaluate. Describing what I'm  hearing is difficult enough, and formulating an approach that will render sonic improvements from one guitar to the next is very challenging. I've generated Chladni patterns on my unattached soundboards in the past, hoping for some "light bulb" moments to reveal themselves, but as interesting as they are, manipulating those patterns or translating my findings into tangible gains is a puzzle I'm solving all too slowly. For the time being, the best I can hope for is that I'll come to judge in some subjective sense that I've made improvements over earlier instruments and have been able to establish a new benchmark from which I can implement refinements on future instruments.


Check my "For Sale" page for details.


Cheers, Pete


Monday, December 2, 2024

SOLD! An Enjoyable Distraction

I had some spare time recently as I waiting for the lacquer I'd sprayed on my current batch of acoustic guitars to cure in readiness for polishing, and as I'm becoming a big fan of headless guitars, I put the guitar pictured together while I had the opportunity to do so.

I've had the maple neck blank and the Queensland maple drop-top cap in my tonewood stash for what must be a decade, so it seemed like a convenient time to put them to good use at last. The mahogany body is comprised of three pieces sourced from the stock of material I'd normally reserve for head blocks on my acoustic guitars.

  • Body: chambered mahogany
  • Cap: Queensland maple (Flindersia brayleyana)
  • Neck: bigleaf maple, with double-action truss rod and carbon fibre reinforcement
  • Fingerboard: ebony
  • Bridge: Nova Guitar Parts
  • Pickups: Kiesel Beryllium humbuckers
  • Finish: Osmo Polyx oil
The guitar came together relatively quickly compared to my usual acoustic guitars. I learned a lot through this process, so I'm looking forward to put the lessons learned to good use on similar electric projects in the near future.

Cheers
Pete

Sunday, October 27, 2024

Dry Sanding With Super Assilex and Super Buflex Abrasive Sheets

I put this East Indian rosewood/European spruce guitar to one side as I proceeded with my usual process of wet sanding and buffing four other guitar bodies, the motivation being that I wanted to compare wet sanding with the dry sanding alternative.

There was an unavoidable delay as I waited for delivery of the Eagle Abrasives' Super Assilex and Super Buflex papers from Stewart MacDonald in the U.S., but as this particular guitar has been in the works for a number of years I figured that in the overall scheme of things another few weeks' wait was immaterial. This product is usually sold in packs of 25 sheets and is costly in such quantities, so the fact that StewMac sells individual sheets was very appealing given that I'd need a range of grits. Note that the grading system used by the manufacturer identifies the papers' grit with an K prefix, which apparently corresponds to the more familiar P designation.

As the last sprayed coats of lacquer had laid down fairly smoothly, I chose to begin sanding with 800-grit paper. Apart from the lack of the usual wet mess, and the ability to dispense with the assortment of towels and rags I usually employ to clear the sanding sludge, I was immediately impressed by the fact that this paper quickly levelled the lacquer and clogged to a much lesser extent than the cheaper sandpapers I'd used in the past. When it eventually did show signs of loading with finish, it was easy to prolong its life by quickly wiping it across a scrap of towelling. In so doing, it struck me that the cheaper papers offer a false economy: they tend to clog quickly even when used wet, and I'd bin a significant quantity of it in the course of sanding a single guitar. In contrast, the Super Assilex and Super Buflex papers were very resilient and relatively long-lived.

I proceeded through 800, 1000, 1500, 2000, 2500 and 3000 grits, alternating the sanding direction between grits as I have in the past in order to more readily identify scratches remaining from the previous grit. With no need to constantly squeegee or wipe away wet slurry, it was pleasing to be able to monitor sanding progress with such ease. With a dry work environment an additional bonus, as I sanded the headstock later I appreciated the absence of water that can seep into tuner holes and potentially cause finish problems.

Having finalised sanding with the finest grit, Menzerna fine compound on my buffing wheels brought the lacquer to a mirror-like shine with much less effort than is usually the case. I buffed the headstock by hand to minimise the likelihood that I'd burn through the edges. Using Meguiars' Ultimate Compound I was able to bring the finish on the headstock to an impressive gloss with very little effort.

Other than the initial expense, I can't see any downside to this paper, and I'm unlikely to ever take the messy wet sanding route again.

Check it out on the StewMac web site: Super Assilex and Super Buflex 

Cheers, Pete 

Thursday, August 1, 2024

Sanding and Buffing Tips

I'm definitely not the most experienced finisher around, and thought it wise recently to undertake something of a personal refresher course by sifting through some relevant forums and Facebook groups with a view to improving the quality of my finishes. Here's a collection of thoughts on wet sanding and buffing that I've compiled:

  • Invest in some good quality sandpaper, not cheap hardware store varieties. There are many good choices; 3M's Trizact is a trusted product, as are many of Mirka's papers.
  • Depending on the quality of the final finish coat, begin sanding with the finest grade of sandpaper that will accomplish levelling of the surface. Most recently, I've started with P600, but will begin with P800 in future. Grits coarser than P600 are probably best avoided. 
  • Keep your work area spotlessly clean to minimise opportunities for dust and other particulate matter to scratch the guitar as sanding and buffing progresses.
  • Wrap sandpaper around a foam or cork block.
  • Sand in straight lines rather than in a circular motion.
  • Having completed sanding with each grit, put rags or paper towels that have been used to wipe away sanding slurry to one side for disposal or cleaning, then grab fresh ones.
  • To more easily identify scratches remaining from the previous grit, sand in an opposing direction when progressing to the next grit.
  • Before use, soak sandpaper in a container of water to which a few drops of dishwashing liquid have been added.
  • Change the water used to wet the sandpaper when progressing to the next grit. Soak the paper before use, as before.
  • As you wet sand, check the sandpaper frequently for any build-up of finish that could cause scratches.
  • To guard against sanding through the finish, delay sanding of edges until the finer grades of sandpaper are in use.
  • Assuming you have access to a buffing arbor, sand through the grades of paper up to at least P1500, although P2000 would perhaps be a better target. Some builders advocate even finer grades of paper, but the Law of Diminishing Returns perhaps applies in this context.
  • When buffing, remove polish residue from the guitar surface frequently to allow the buffing wheel to contact the guitar surface rather than the polish residue, which can impede progress. Removal of the greasier buffing compounds can be difficult; a drop or two of swirl remover rubbed over the affected area, then removed with a clean, soft cloth seems to work well.
  • Complete the polishing process with a liquid swirl remover, either by hand, or with a drill-mounted foam pad.
  • Be patient!   

As I remarked in the first paragraph, I'm no expert, so if you disagree at all, or care to expand the list, please feel free to comment below.

I aim to experiment with dry sanding as an alternative approach shortly. Stay tuned for a blog post on that topic.

Cheers, Pete 


Sunday, July 28, 2024

On the Home Stretch

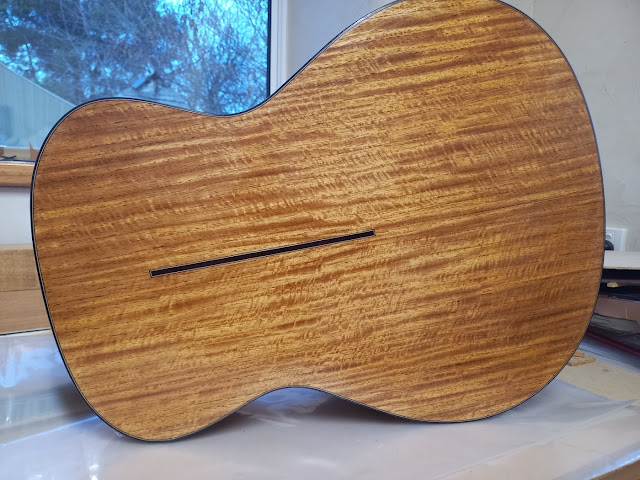
It's a fact of life that events and circumstances can conspire to delay and reshape our plans, and this has certainly been the case where the instrument pictured is concerned.


Given that building guitars is such as passion for me, it's amazing - and even a little embarrassing! - to reflect on the fact that I began this guitar around twelve years ago. With a busy life that revolved around a nine to five job, time to pursue hobbies was in short supply all those years ago, and progress was understandably slow.

In part because of that situation, recalibrating the balance between work and play became a priority for my partner and for me, and we finally made the momentous decision to relocate, with a view to escaping the pace and pressures of city life, reducing our working hours and living expenses in the process.

After the stress and upheaval of an interstate move, we found ourselves renting a tiny cottage in a small village three hours' drive from Melbourne. While we were happy with our decision, and overjoyed to have made the move, other than for a brief period when I had access to a vacant shop a few hundred metres from home I was without a space in which to work, and guitar building was unavoidably put on hold.

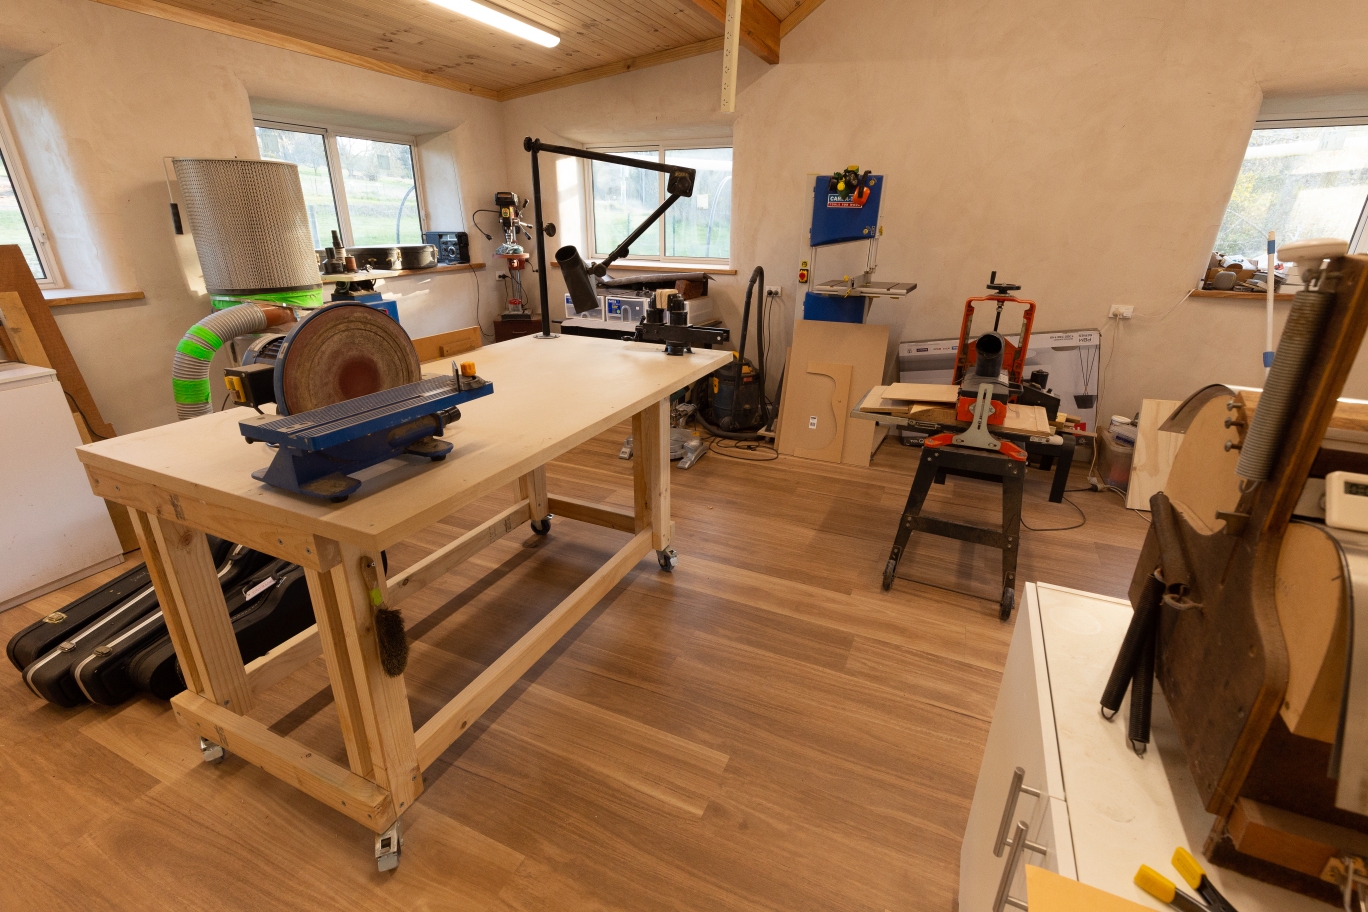
We eventually persuaded our landlord to sell us the house, at which point reality set in: after seeking several quotes from local builders, I had to acknowledge that the cost of having a suitable workshop built to my specifications was prohibitive given our severely reduced income. Building with straw bales had captured my imagination several years earlier, however, and, even for someone like me with no prior building experience, building a straw bale workshop seemed achievable and much more affordable given that I'd complete the bulk of the work myself. Fast forward nearly four years, and my workshop was finally completed - previous blog posts show progress.

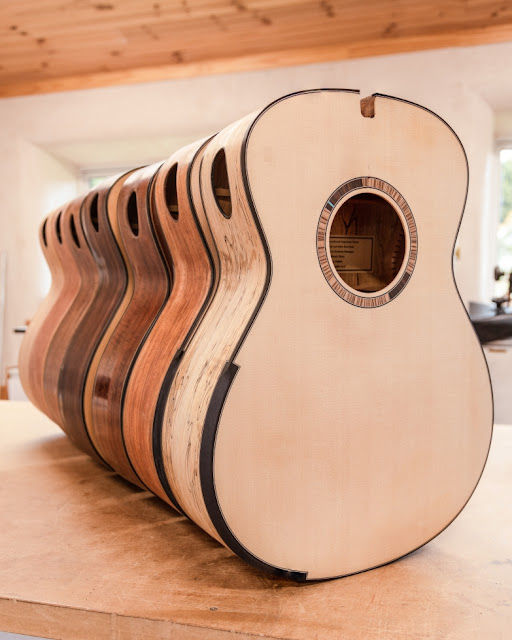
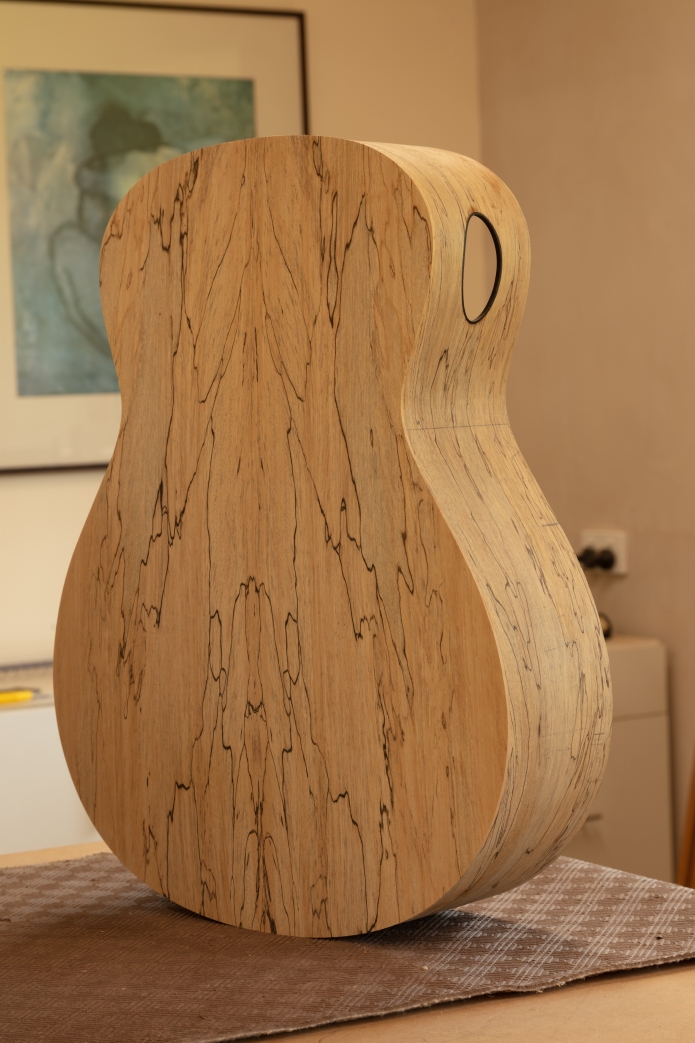
With that mammoth building project behind me, pent-up enthusiasm and my typical lack of discipline resulted in me commencing a number of new instruments, and it's only now that I begin the homeward run towards stringing this particular guitar up, hopefully within the next few weeks. Assuming, of course, that life events and circumstances allow it!

Cheers, Pete

Tuesday, July 23, 2024

Level Sanding and Buffing

I'm still chasing rogue sanding scratches and polish residue on this Claro Walnut/Port Orford OM body, but I'm calling it "done" for the time being. I'll return to it shortly with fresh eyes and renewed enthusiasm.


It's been some time since I last level sanded and buffed a guitar, and I've been reminded once again that a thorough approach to sanding through a sequence of ever-finer sandpaper grits is crucial to attaining the scratch-free finish that I'm looking for. I began levelling the finish with P600 grit wet-or-dry sandpaper, proceeding through P800, P1000, P1500 and P2000 papers, using soapy water as a lubricant, before buffing with Menzerna polishing compound on a buffing wheel. Having done so, I'm close to achieving the desired outcome, but there's considerable work remaining before sanding scratches are reduced to what I consider an acceptable level.

This guitar body is the first of five that I'll be sanding and buffing, and I'm aware that if I'm disciplined enough and pay sufficient attention to detail, I can minimise the level of frustration that I always deal with throughout this time-consuming process.

Cheers, Pete

Thursday, May 9, 2024

The Long Wait

As keen as I am to string these guitars up and wave them goodbye, I have no choice but to wait several weeks for the lacquer top-coats to cure before I sand and polish them. I know from experience that to give in to my typical impatience is an exercise in futility, so the long wait begins.


Cheers, Pete

Sunday, May 5, 2024

The Finish Line

After what feels an eternity, I managed to begin the arduous process of applying finish to this crop of guitars this morning, with a seal coat of shellac applied ahead of the first coats of lacquer tomorrow.


I have three other guitars under construction, but with the inevitability of cold wet weather ahead I vowed to put them to one side and take advantage of our unseasonably dry autumn with a view to finally completing these instruments, some of which I began years ago.

With fresh ideas in mind, I'm well and truly ready to move on from this collection of instruments, and I've come to the realisation that working on a big batch of guitars like this can detract from my enjoyment of the process. A completed instrument would be nice!

Cheers, Pete

Sunday, April 14, 2024

Bridge Day

With a template describing the bridge outline, and an appropriate jig to facilitate routing of the saddle slot, it's a fairly quick and easy job to fabricate these guitar bridges. A rasp, some cabinet scrapers and sandpaper complete the job after the blank has been cut to shape. The underside of the bridge will be shaped to match the dome of the soundboard at a later stage.

The bridges pictured are of Macassar ebony and padauk. Despite its somewhat extravagant colour, I look forward to using the padauk bridges; it's a much low density than the ebony. Unfortunately, padauk is yet another wood species that has recently been added to the CITES list, so these are the last bridges I'll have the opportunity to make from it.

Cheers, Pete


Monday, July 3, 2023

What's In a Name?

The back and sides of this guitar are of narra, which is an alternative name for a wood that's most often marketed here in Australia as New Guinea rosewood.


According to Wikipedia, the tree is a species of Pterocarpus native to southeastern Asia, northern Australasia, and the western Pacific Ocean islands, Cambodia, southernmost China, East Timor, Indonesia, Malaysia, Papua New Guinea, the Philippines, the Ryukyu Islands, the Solomon Islands, Thailand, and Vietnam."

The wood is closely related to padauk - it's most definitely not a true rosewood - and as its range extends well beyond New Guinea, I much prefer to choose a less misleading name when discussing this guitar.

Most significantly, it's beautiful, easy to work, smells great and has a good reputation as a tonewood. What's not to like?


Cheers, Pete 

Sunday, July 2, 2023

Wow Factor - Australian Blackwood

I couldn't wait to see the grain of this Australian blackwood come to life when epoxy was applied, so I didn't!

This wasn't a particularly expensive set of back and sides, so I'm very pleased that a thin film of epoxy has had such a dramatic effect.

More practically, this not only gives me a head start where pore filling is concerned, but has provided a level of protection to the wood ahead of routing binding channels and installing the ebony bindings.


Cheers

Pete

Saturday, May 27, 2023

Winter Is Coming!

As I immersed myself in the task of designing my workshop a few years ago, I looked into the possibility of dedicating a corner of the building to a spray booth. As inviting as the idea was, I was discouraged by the prospective cost of the necessary explosion-proof extraction fan and lights and abandoned the idea. I'm left with Plan B, which is to erect a temporary insect-proof enclosure in a sheltered area of our property which, unfortunately, limits my ability to spray through the winter months when daytime temperatures are typically in single digits and high humidity is problematic.


I came close recently to buying fresh supplies of lacquer and thinners in readiness for spraying this crop of guitar bodies; however, although there are still stretches of fine weather, they are unreliable and increasingly uncommon. As keen as I am to complete some guitars, I've come to accept that I've probably left my run too late.

I'm impatient and more than a little frustrated, but I'm sure I'll find plenty to occupy me through our winter months. Obviously, I'm looking forward to spring when I'll finally be able to string up some guitars!


Cheers

Pete

Tuesday, May 16, 2023

The Other End of the Workshop

It's only natural - and advantageous - that guitar builders develop some skills where playing the guitar is concerned. Frankly, I'd love to be more adept as a player and be able to better assess the acoustic instruments I create in terms of their playability and tone. Unfortunately, after 50 years of sporadic playing I have limited abilities and don't practice nearly often enough to improve in anything other than small increments. Some ongoing hand problems I've learned to live with also contribute to my limitations as a player.

Nevertheless, I still enjoy an hour or two of mindless noodling from time to time, and with that in mind I've set up a desk in a spare corner of the workshop where I can plug in an electric guitar, with visions of recording some original music on the rare occasions that inspiration pays me a visit.

Having concluded that I have no aspirations to gig anywhere even if I thought I was a decent enough player, it seemed wasteful and self-indulgent to have collected an assortment of effect pedals and an amplifier that together represent a significant financial outlay. With my pedals and amplifier currently for sale, my new approach to playing my electric guitar is to make use of a couple of Neural DSP's plug-ins and either a pair of headphones or some studio monitors. Along with my laptop and an audio interface, I can dial in a greater variety of tones than I previously could with my amp and pedals and, as a result, I have hopes that I'll be motivated to devote more time to playing and practice once our cold, wet, winter weather closes in and I'm less inclined to attend to outside jobs around our little property.

  • Audio interface: PreSonus Studio 26c 
  • Studio monitors: KRK Classic 5
  • Headphones: PreSonus HD9 Professional Monitoring Headphones
  • Plug-ins: Neural DSP's Archetype: Cory Wong and Archetype: Rabea
  • Guitar: Ibanez Q54


Cheers

Pete

Thursday, January 19, 2023

A Finishing Problem Solved

I had the use of an unoccupied shop here in town for a few months in 2016 and was able to work on some instruments there until the owner asked that I vacate so he could begin renovations. I had recently sprayed lacquer on three guitar bodies and their necks at the time, and they hung inside a cupboard with a computer fan porting the fumes to the exterior of the building for a few weeks while I got on with other things. When it finally came time to pack up and move out, I placed the guitar bodies and necks in some cheap new cases, comfortable in the knowledge that they’d be protected throughout the move and beyond.

From that point on, construction of my workshop became a priority that occupied me for more than three years. When the dust had settled and I was ready to complete those guitars, I found that dye from the lining of the guitar cases had penetrated the lacquer on the soundboards to an unknown degree, although I figured it was likely that the staining extended to a significant depth. I pondered how best to remedy the situation for some time, often practicing avoidance behaviour for months at a time as I moved ahead with new instruments.


Scraping and sanding the lacquer off the soundboards and respraying was one option, but I worried that merging new lacquer into old may have given less than optimal results; I’d used a pre-catalysed lacquer that supposedly doesn’t melt into previous coats as effectively as nitrocellulose.

The alternative was to use a chemical stripper over the entire body which would essentially take me back to square one in the finishing process. The degree to which I’d be successful in neutralising the stripper before I applied new sealer and top coats gave me cause for concern though.

After weighing up the advice kindly offered by a couple of Facebook friends, I decided to strip the finish from the bodies entirely. While acetone softened the finish to the extent that it was at least sticky and could be removed with difficulty using steel wool or a single edged razor, it was a painfully slow process, and I concluded that removing all of the lacquer in this way was far too onerous a task. I opted for regular paint stripper which proved very effective in softening the lacquer, allowing it to be easily scraped off. I was careful to remove all traces of the stripper using generous quantities of denatured alcohol, and I'm ready - once again - to pore fill in readiness for spraying.


As I began work on these guitars up to twelve years ago, you'll no doubt appreciate how keen I am to complete them and resume work on other instruments I've commenced more recently.


Cheers

Pete

Friday, December 2, 2022

Manchinga/Engelmann Spruce OM Update

With the top now attached, I now have four guitar bodies ready for binding - something to look forward to (said nobody, ever!)


Cheers, Pete

Saturday, November 19, 2022

Progress: Manchinga/Engelmann Spruce OM

I've made some progress with this guitar over the past few weeks; however, I was hampered by the manchinga sides that rippled badly across the grain in the process of bending them. This has been my first experience working with manchinga, and I suspect that a little less water applied to the sides prior to bending them may have contributed to a better result. I had partial success in flattening them by soaking them in Supersoft veneer softener and clamping them for a couple of days in the mold I use to laminate sides. The remaining inconsistencies were masked once the veneers were added to the interior of the sides, and sanding will flatten their outer surface without removing too much material.


Check out the grain in that amazing Engelmann top!


Cheers, Pete


Thursday, September 22, 2022

Next Cab Off the Rank? A Manchinga OM.

This set of manchinga has been gathering dust in my modest tonewood stash for several years. From the time that I acquired it I resolved that wood this remarkable should be set aside for as long as possible in the hope that my skills would eventually grow to a point at which I'd consider myself able to do it justice.


Whether I'm at that point or not, the reality is that I'm not getting any younger, so while my eyesight is still in good shape I'm preparing to take the plunge and begin construction of a guitar using this beautiful wood, coupled with a drop-dead gorgeous Engelmann spruce soundboard I've also been saving for something special.

I'll post a progress report on the other three guitars I'm working on very soon.


Cheers, Pete

Wednesday, June 15, 2022

A Little Eye-Candy.

Here a progress shot of two of the three guitars I'm currently working on: an Australian blackwood/Engelmann spruce OM, and a Bubinga/Sitka spruce OM.


A Narra/Engelmann OM has been a late addition to the production line, the motivation being that I'd like to try a bevelled armrest for the first time.

More updates soon.


Cheers

Pete


Tuesday, April 12, 2022

What's on the Bench?

As many of my blog posts hereabouts will attest, construction of my workshop occupied me for the best part of four years; even now there are "finishing off" tasks that divert me from guitar building. More significantly, the list of jobs around the house expanded impressively while I was focused on the workshop, so I've made a point of addressing enough items on the list over the past few weeks that I've been able to increase my guilt-free time attending to a couple of new guitars, both of which are at a similar state of completion.

I added some inner laminations of cherry veneer to the sides on these guitars, the advantages being that:

  • the potential for cracks in the sides is largely eliminated meaning that the application of bias tape or cross-grain wooden reinforcement is no longer required.
  • the sides are dead flat across the grain once laminated; there's no cupping or rippling and therefore no requirement to sand them flat.
  • a stiffer and more massive rim assembly means that the vibration of the top and back plates is absorbed by the sides to a lesser degree than would otherwise be the case.

There are many ways to laminate the sides, but I settled on using a jig modelled after the one pictured below, the idea for which I borrowed from guitar builder Ryan Gerber.


Side laminating jig


Australian blackwood/Engelmann spruce OM

Bubinga/Sitka spruce OM


Cheers
Pete

Sunday, December 19, 2021

The Bubinga Lottery

The task of bending the sides gave some cause for concern when I decided to use my one and only set of Bubinga recently. I was already aware that bending this wood can pose challenges, and on researching the topic it became apparent that unhappy accidents are commonplace. To mitigate the potential for disaster, I took the cautious approach and doused the sides in Supersoft veneer softener and shrouded them in plastic for a couple of days before unwrapping them and allowing them to dry completely prior to bending them.


When I finally took the plunge and inserted them in my Fox bender, sandwiched between layers of damp craft paper and wrapped in aluminium foil, I cranked the temperature of the heating blanket up to around 320F and allowed them to cook at that temperature for a good ten minutes. When the sides had cooled to room temperature and I was able to remove them from the bender, I found that they'd survived the ordeal with no sign of the cracking or faceting that others have experienced.

What I've learned about this wood is that there are several Guibourtia species marketed as Bubinga, which perhaps explains the variety in appearance encountered between individual examples. With the sides successfully bent to shape, I've concluded that either the precautions I took contributed to my success or that the particular variety I'm working with tends to be less troublesome than other species. With Bubinga now listed on CITES and therefore no longer available in this country, I guess I should count my blessings as I forge ahead with this guitar, safe in the knowledge that I'll never have to deal with it again.


Cheers

Pete

Saturday, December 18, 2021

Australian Blackwood/Engelmann Spruce OM

In terms of figure, this Australian Blackwood might rate as a "AA" back-and-sides set; however, there's enough contrast and colour present that it's perhaps deserving of a more generous assessment.

After a years-long break from building, this guitar is proving to be an exercise in rust removal; I'm feeling the need to think carefully before proceeding from one step to the next, re-assessing processes that were once second nature.


The degree of difficulty has been increased due to my decision to laminate the sides (using inner layers of cherry veneer), and redesign the head block to provide better support for the fretboard extension.

Because the sides are laminated, the individual layers from which the sides are composed will be exposed when a soundport is cut out which, to my way of thinking, will look unsightly. With that in mind, I plan on binding the soundport, which necessitates that I build a jig as a next step that will allow me to use a laminate trimmer to route out the soundport, guaranteeing a flat gluing surface around the port's edges for the veneers and binding. Bending, gluing and clamping those veneers and binding will pose yet another challenge.

So far, so good!


Cheers

Pete

Monday, September 27, 2021

Now, Where Was I...?

I had planned to fit out my workshop with cupboards I built myself, but the mess I made as I fashioned a new workbench top out of MDF was the nail in the coffin where those ambitions were concerned. As the photos hereabouts show, I’ve taken the easy, dust-free path and installed some cheap, ready-to-assemble cupboards and drawers.

There are some minor tasks to attend to before I can declare my workshop 100% “done”, but I’m very pleased to have reached a stage where I can balance those needs with the more satisfying, creative aspects of life that have been missing to some degree as I've built this workshop.

There was always a danger - however remote - that when the opportunity to resume my guitar building adventures finally presented itself, I’d discover with dismay that the urge to do so had mysteriously evaporated sometime during the past three years. So, it was with a sense of relief as I sorted through my modest tonewood stash a week or two ago that I felt an overwhelming wave of anticipation and excitement wash over me as I mentally toyed with wood combinations and considered the guitar models their potential would be best served by. Any fears I might have harboured where my ongoing commitment to this craft is concerned were banished instantly.

With ideas for new instruments currently competing for attention as they swirl around in my head, I’m happy to let them fight it out until a clear winner emerges. In the meantime, I plan to fabricate templates and moulds suitable for a couple of new guitar models that will complete the range of body sizes and shapes I intend limiting myself to.


Cheers, Pete

Too Good to Burn!

Pictured are some chunks of red gum (Eucalyptus camaldulensis) that I snatched from the wood delivery man's hands as he stacked a delivery of firewood at the rear of my house.


I guess this only goes to show that we're not always conscious of the beauty surrounding us, and that more enduring and meaningful use can be made of such precious materials if only we are open to their possibilities.

I'm sure this wood will find its way into a future guitar in the form of a bridge, rosette, or headstock veneer.

Cheers, Pete


Thursday, June 7, 2018

There's Nothing New Under the Sun!

Over the years, I've given a lot of thought to developing a signature look for my guitars and, for the most part, I'm satisfied with that aspect of their construction. Having said that, I'm sure there will be further evolution, as well as minor variations from one instrument to the next.


It's probably inevitable that with the limited canvas afforded by the guitar I'll often find instances of others' instrument designs having arrived at a similar destination in an aesthetic sense; my initial reaction when I discover that the headstock, heel cap, bridge shape or rosette design I invested so much time on exists elsewhere is one of mild disappointment. However, rather than seeking to change my own designs and embark on an endless exercise in tail chasing, I'm learning to accept that there's nothing new under the sun, and that there's no point in pursuing that particular mirage - no good can come from it, and constant disappointment can be the only predictable outcome!


As much as I admire design elements such as, for example, Kevin Ryan's "acoustic flutes", Michael Greenfield's ever-so-cool bridge shape, or Sheldon Schwarz's multiple oval soundholes, they strike me as truly unique designs that help identify those builders' instruments - part of their "brand", if you like. Although they're very inspiring, out of admiration and respect I would never seek to imitate those examples. Instead, I'll continue to be receptive to new ideas that drift into my consciousness, rejecting any that tend towards deliberate mimicry - assuming that I know they do!


With that in mind, I have some exciting "new" design features brewing that will unfortunately only see the light of day once I've built my workshop. I can't wait to turn them into reality!

Cheers
Pete

Wednesday, March 8, 2017

Self-Motivation!

Just so visitors to this blog don't think that I've forgotten about guitars completely, I took a few photos earlier this week showing the state of play with the three guitars currently sitting in their cases under the bed. With little chance of progress until I've constructed a workshop, I tend to drag these guitars out into the light occasionally in an effort to maintain my motivation levels.

Finish was applied a few months ago, but without a work space, I'm unable to sand and buff them, attach bridges and install frets. The walnut/redwood guitar is an exception in some respects, and is tantalisingly close to completion; the neck on this guitar has an oil finish, so I was more easily able to install and dress the frets before I vacated my previous workshop here in town.

Construction of my workshop is a significant undertaking given that a shortage of funds necessitates that I complete as much of the work as I can myself. As a lifelong procrastinator, I need to constantly remind myself what a big part of my life this hobby/obsession has become and, therefore, just how important it is that I take concrete steps towards realising my dream of having a purpose-built workshop in which I can build guitars on a more-or-less full-time basis.

East Indian Rosewood/European Spruce Modified OM
Claro Walnut/Port Orford Cedar Modified OM
Claro Walnut/Redwood OM

Cheers
Pete

Tuesday, January 24, 2017

A Workshop, a Workshop, My Kingdom for a Workshop!

With several guitars 90% completed, it's a little frustrating to once again find myself without a workshop, or even a makeshift workspace I can use temporarily.


In moving interstate into a much smaller and cheaper house in 2015, the ultimate vision was that my partner and I would be financially able to engage a builder to construct a purpose-built workshop in which I could fulfil my dream of building guitars on a more-or-less full-time basis. Reality has bitten hard, however, and the quoted price for such a building has been a little shocking, to say the least.

Plan B - the cheaper option - involves me learning a new set of skills in order to build a suitable workshop myself. My preferred building method will involve a post-and-beam framework, with straw bales used as infill between the timbers comprising the walls. The interior and exterior of the bales will be rendered so as to seal them against the elements and provide the necessary rigidity.

Proposed workshop site, with a view over an adjacent reserve.
Step 1, which I have almost achieved, involves settling on a rough design. The second, more challenging step, requires negotiation with the appropriate authorities to secure the necessary planning and building permits. I'm prepared for this to be a long, drawn-out process, complicated somewhat by the fact that our property sits in a zone susceptible to bushfires.

Needless to say, this is something of a departure from my usual instrument building adventures and is at odds with the nature of this blog, but I'll post progress reports and photographs here from time to time for anyone interested. Unfortunately, photos of guitars will have to wait a while!

As usual, please feel free to ask questions, or make comments.

Interesting links:
Why Build With Straw Bales?
Building a Home Using Straw Bale Construction


Cheers
Pete

For Sale: Claro Walnut/Redwood OM

It's taken such a long time to complete this guitar that it features a body shape I've long since modified. The shape of the heel is...